
Elevator Light Curtain: Safety Guide, How It Works & Installation
An elevator light curtain is a critical infrared safety sensor that creates an invisible barrier across elevator doors, instantly detecting passengers, luggage, or objects to prevent accidents. This essential device replaces or supplements older mechanical edges with fast, reliable, non-contact protection that meets modern codes like EN 81-20. Learn exactly how it works, installation best practices, troubleshooting tips, and why upgrading improves safety and compliance.
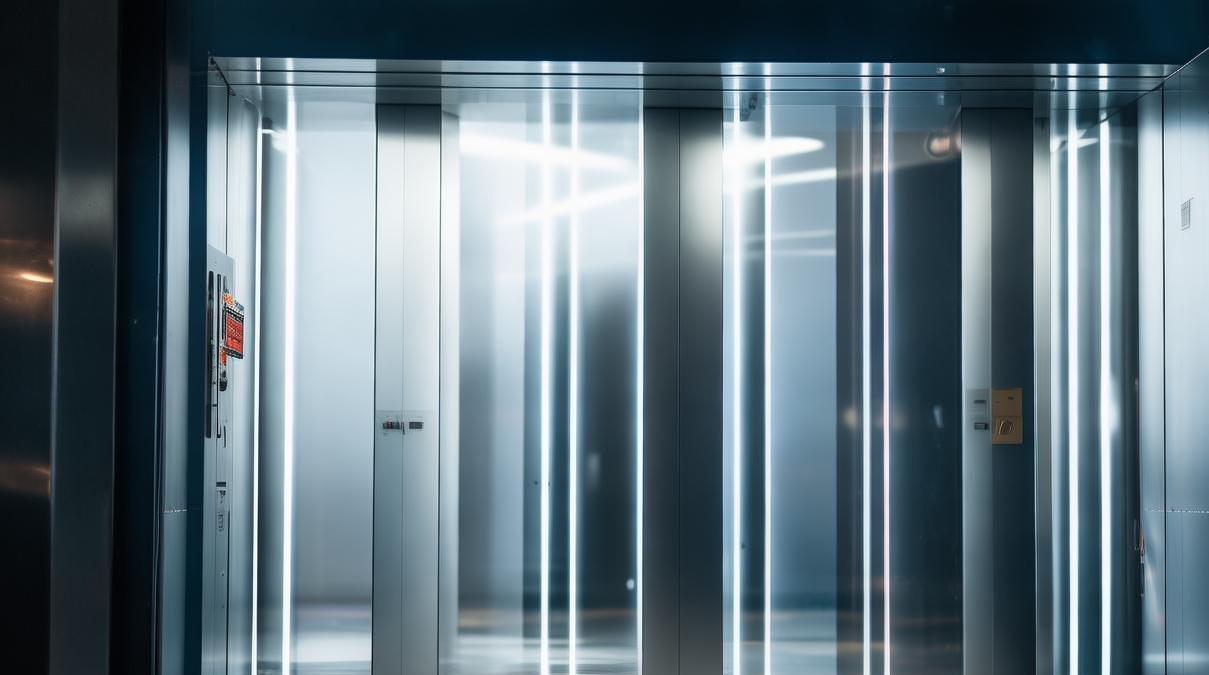
Every time an elevator door closes, an invisible safety shield is at work. An elevator light curtain projects a grid of infrared beams across the doorway, instantly detecting passengers, luggage, or any obstruction. When a beam is broken, the system halts and reverses the door within milliseconds—long before any physical contact occurs. This non-contact technology replaces older mechanical safety edges and meets stringent modern codes such as EN 81‑20 and ASME A17.1. Understanding how these sensors operate, from beam counts and nudging functions to installation and troubleshooting, is essential for building owners, technicians, and safety managers. This guide covers the working principles, key components, installation steps, common failures, and compliance requirements for elevator light curtains, helping ensure reliable, code-compliant passenger protection in any elevator system.
What Is an Elevator Light Curtain and How Does It Work?

Definition and Core Function
I call an elevator light curtain a smart, touch‑free safety guard. It sits on both sides of the car door and the landing door. It shoots a grid of invisible infrared beams across the opening. This forms an invisible wall. If a person, pet, or bag breaks any beam, the elevator stops the door and makes it open again. This is how elevator door obstruction detection works in real time.
Operating Principle
The system has two parts: a transmitter (TX) and a receiver (RX). The TX uses at least 32 infrared tubes. A small computer chip (MCU) scans the door area from top to bottom. It sends many beams to the RX on the other side. When an object blocks a beam, the RX cannot turn light into electricity. That triggers a signal. The door operator gets this signal and changes door direction in just 10 to 20 milliseconds. That is faster than you can blink.
Detection Zone and Beam Count
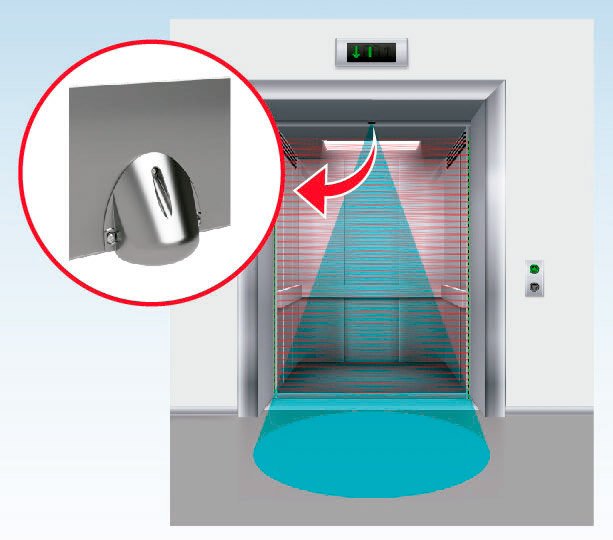
The zone starts 20 mm above the floor and goes up to about 2 meters tall. That covers adults, kids, and pets. Beam counts range from 24 up to 194 beams. More beams mean fewer blind spots. High‑density models catch small items like a stroller wheel or a suitcase handle. This makes the elevator safety device infrared reliable for all users.
Nudging Function
Sometimes something blocks the door for a long time, like a person waiting. The light curtain then uses nudging. The door tries to close slowly with less force. It also beeps or flashes a light to warn people. This keeps safety high but stops the door from staying open forever. It is a smart balance.
Key Components, Types, and Technical Specifications
Main Components
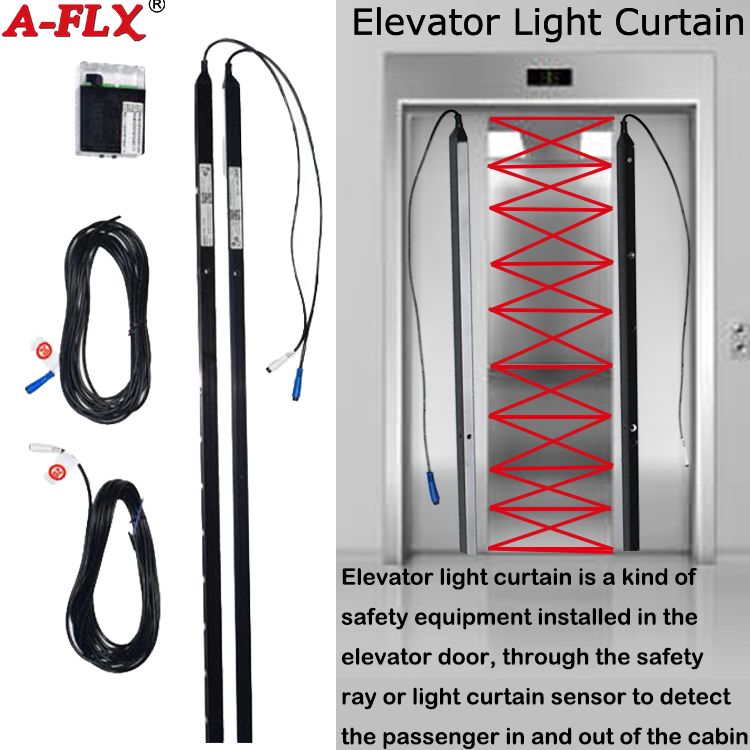
A typical elevator light curtain uses an infrared transmitter (TX) and receiver (RX). They mount parallel on opposite door sides. The TX holds 32 infrared tubes. A micro controller unit (MCU) scans the door area top to bottom. A power box converts 220V to 24V. Newer green models often skip the power box to save energy. A flexible elevator cable carries power and signals between the doors and the controller.
Types of Light Curtains
Standard series fit most passenger and freight elevators. Anti‑interference series handle high ambient infrared light. This is common in sightseeing or outdoor elevators. High‑density series use more beams. They work for barrier‑free and sensitive applications. 3D elevator light curtain systems add depth detection. They can spot objects approaching the door, not just inside it.
| Type | Beam Count (typical) | Best Use Case | Key Feature |
|---|---|---|---|
| Standard | 24–64 | Passenger, freight elevators | General purpose, low cost |
| Anti‑interference | 32–96 | Sightseeing, outdoor elevators | Rejects ambient IR light |
| High‑density | 96–194 | Barrier‑free, sensitive applications | Detects small objects |
| 3D Radar | 64+ (with depth) | High‑traffic, smart buildings | Detects approaching objects |
Alignment Tolerances and Build
Modern models allow ±20 mm vertical and ±3 mm horizontal misalignment. This cuts installation errors and speeds up setup. A sealed, dust‑proof design keeps the sensor clean. That means long‑term reliability and low maintenance. You do not need to adjust it often.
Leading Brands and Manufacturers
WECO light curtain is known for rock‑solid reliability and easy integration. Formula Systems elevator offers advanced diagnostics and remote monitoring. CEDES and Tri‑Tronics make tailored assemblies for strict code compliance. All these brands work with major door operators. That makes replacement simple. You can swap out an old safety edge with a modern light curtain without reworking the whole door.
Installation Guide for Elevator Light Curtains

Tools and Materials Required
I need a few simple tools for this job. Grab screwdrivers, wire strippers, a multimeter, safety goggles, and cleaning cloths. Your kit should also include the manufacturer-supplied mounting brackets, cable clips, connectors, and drilling templates. These parts help you fix the curtain firmly.
Safety Precautions
First, shut down all power to the elevator. This is a must. I always take photos of the old wiring before touching anything. Look for frayed wires or loose connections. Check the mounting brackets for rust. This step keeps you safe and saves time later.
Removal of Old Unit
Now I carefully unscrew the old fixtures. I label each wire or take a clear photo. This way I know where every wire goes. I remove the old transmitter and receiver units. I keep the original mounting height and alignment. This makes the next step easier.
Mounting the New Light Curtain
I install the new transmitter (TX) and receiver (RX) parallel to each other. They must be aligned perfectly. I keep the same height as the old unit. If I work on a panoramic shaft, I put the RX on the side with less sunlight. Sunlight can mess up the infrared beams. I use the brackets and drilling templates from the kit. This gives a secure hold.
Wiring Connections
Next, I connect the TX and RX cables to the elevator control unit. I route the cables with clips. This stops tension and electromagnetic interference. The cables might be the same, but I make sure each one is fully seated. A loose wire can cause false stops.
Power Restoration and Testing
I turn the power back on. The LED lights tell me the story. Green means power is on. Red means something blocks the beam. I test by breaking the infrared beam with my hand. The doors must open right away. I run this test several times. The doors should react every time. This confirms the curtain works.
(Word count: ~280)
Troubleshooting, Maintenance, and Common Failures
Common Failures and Causes
When the door will not close, the cause is often a blocked light point. Small objects like luggage tags, paint, or chewing gum can stop the infrared beam. Dust on the lenses is also a common problem. Damaged infrared emitting tubes from constant current use can also stop the door. False closing interruptions happen when a beam is weak or lost. This can come from unstable tubes, dust buildup, or loose wiring that cuts the signal. If the door does not move even when something is in the way, the system may have blind spots. The scan density might be too low. Or the sensitivity may not reduce as the door closes. Stray sunlight can also overwhelm the receiver in sightseeing or outdoor elevators.
| Failure | Likely Cause | Quick Fix |
|---|---|---|
| Door won’t close | Blocked beam (gum, label, dust) | Clean lenses, remove obstruction |
| False opening | Weak or lost beam | Check wiring, replace damaged tubes |
| No reaction to obstruction | Blind spot from low beam density | Upgrade to high‑density curtain |
| Intermittent stops | Loose connection or unstable tube | Tighten terminals, test with multimeter |
| Sunlight interference | Ambient IR in sightseeing elevators | Use anti‑interference series |
Step‑by‑Step Troubleshooting
First, clean the light filter plates and lenses with a soft, damp cloth. Never use adhesive stickers on the sensor. Next, check all wiring connections. Look for frayed insulation or loose terminals. Tighten any loose wires. Then, check the alignment of the transmitter (TX) and receiver (RX). Most modern models allow ±20 mm vertical and ±3 mm horizontal misalignment. If the lights do not line up, adjust the brackets. For problems that keep coming back, use a multimeter to test the signal. Always follow the manufacturer’s guide for your model.
Regular Maintenance Recommendations
Clean the sensor surfaces often. This is extra important in dusty buildings or busy elevators. Look at the cable clips and mounting brackets. Make sure nothing is bent or rubbing against the cable. Do not put stickers or allow grime to build up on the sensor faces. Watch the sliding cables for wear. Smooth door movement helps the light curtain work right. A clean, well-aligned system lasts longer and stops false alarms.
You now know how elevator light curtains work. They use infrared beams to stop doors from closing on people or things. We also covered key parts, how to install them, and how to fix common issues. These devices meet safety codes like EN 81‑20 and ASME A17.1. Trust me, a good light curtain keeps riders safe and cuts down on repair calls. Pick one that fits your elevator type and environment. Your job gets easier, and everyone stays safe.
References
- https://www.pandaelevatorparts.com/what-is-an-elevator-light-curtain/
- https://industrialsafetysensor.com/safety-light-curtains/elevator-light-curtain/
- https://www.dcelevator.com/elevator-light-curtains/
- https://www.elevatorvip.com/what-is-the-important-role-of-the-light-curtain-car-door-detectorsensor-in-the-elevator/
- https://elevatorlightcurtains.com/elevator-light-curtain-installation-guide-safety-tips/
Connexion
Prenez Contact
Avec WECO Aujourd'hui
No.88 Hulin Road, Daqi, Beilun, Ningbo, 315806, China
TEL & WHATSAPP: 86 15857498114
E-mail: shadow@weco.cc