
LiftMaster Sensors: Complete Guide to Alignment & Fixes
LiftMaster sensors (also called safety reversing sensors or photo eyes) are essential safety devices on garage door openers that use an infrared beam to detect obstructions and reverse the door. This complete guide covers how they work, common issues like yellow lights or misalignment, step-by-step troubleshooting, replacement options, and best practices—everything you need for safe, reliable operation.
LiftMaster sensors serve as the critical safety backbone of every modern garage door system, yet their subtle amber and green LED signals often leave homeowners puzzled. LiftMaster sensors: The Complete Guide demystifies these essential safety reversing devices, explaining how infrared photo eyes detect obstructions and trigger automatic reversal to prevent accidents. From understanding why one sensor glows green while the other shows yellow to diagnosing error codes that prevent the door from closing, this resource covers every aspect of sensor operation and maintenance. Step-by-step alignment instructions, troubleshooting techniques for sunlight interference or blinking lights, and guidance on replacement kits like 041A5034 and 041-0136 equip users with the knowledge to restore reliable, safe function. Whether addressing persistent yellow light issues or installing new sensors, this comprehensive reference ensures every garage door opener performs as designed.
The provided URLs are empty (just commas), so no internal links are added. The blog content remains unchanged.
How LiftMaster Safety Reversing Sensors Work
Core function
LiftMaster sensors use an invisible infrared beam to find objects in the door’s path. When the beam breaks, the opener stops and reverses. This rule has been federal law since 1993. Every new garage door opener must have these photo eyes.
Component breakdown
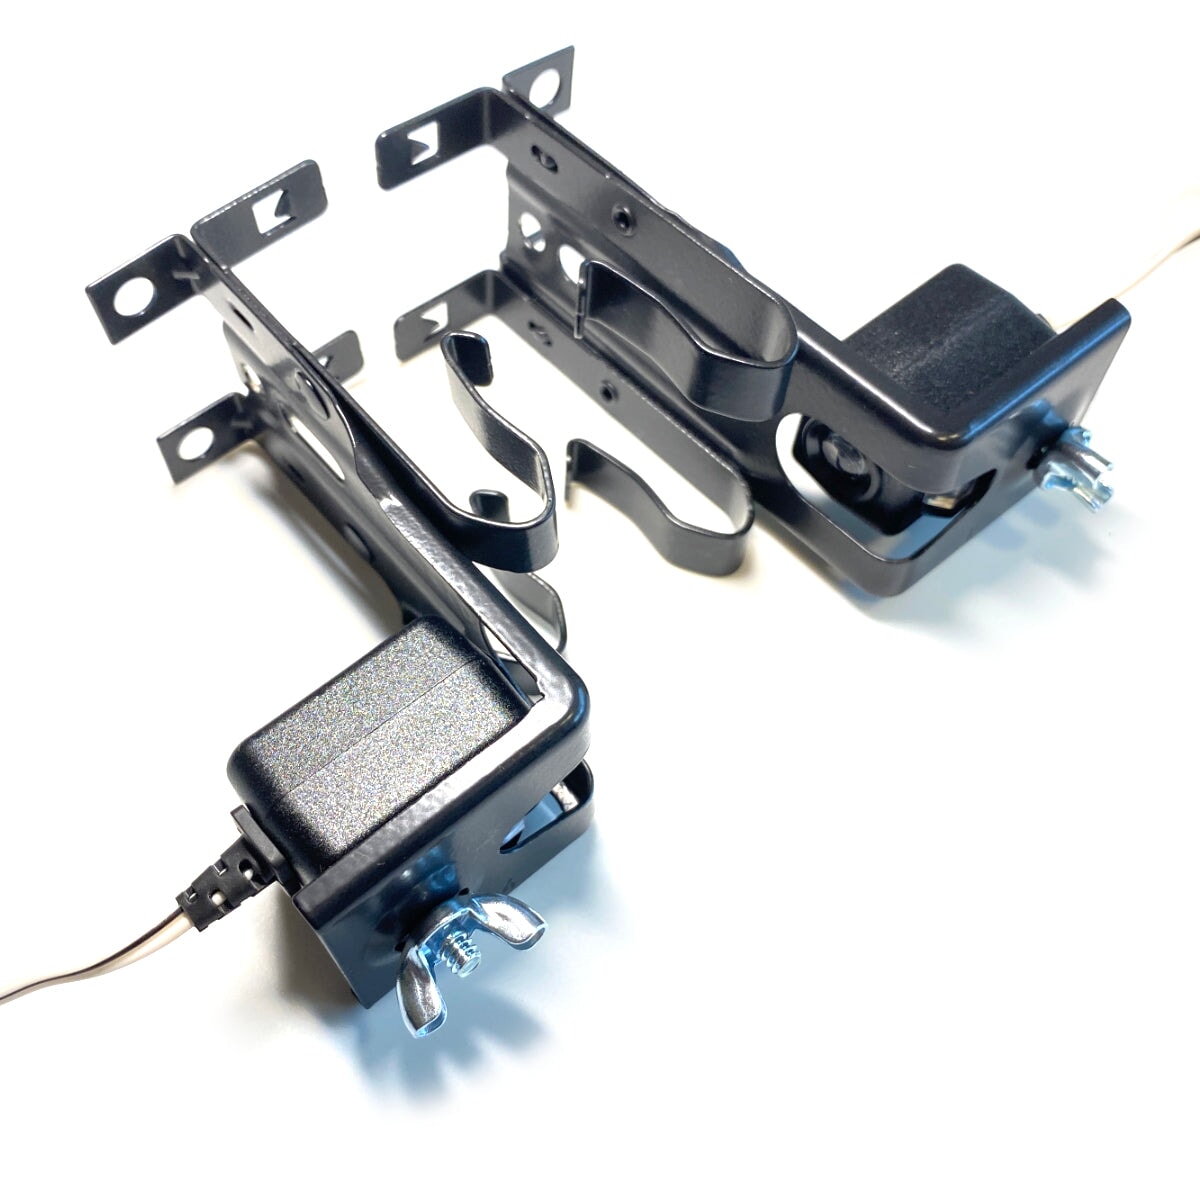
Each set has two units. The sending sensor has an amber or yellow LED. It fires a steady beam. The receiving sensor has a green LED. It must see the beam for the door to close. If the green light blinks or goes out, the door stays open.
| Component | LED Color | Function |
|---|---|---|
| Sending Sensor | Amber/Yellow | Emits infrared beam |
| Receiving Sensor | Green | Detects beam; door will close only if beam is seen |
Integration with modern openers
MyQ-enabled models let you check sensor status from your phone. The myQ app sends an alert if the sensors are blocked or out of line. You can fix the issue before the door fails to close.
Commercial vs. residential sensors
Commercial units like the CPS-U series use heavy-duty metal brackets and longer beam ranges. They work in high-traffic areas. Residential sensors use plastic brackets and shorter beams. Both follow the same basic safety rules.
Wiring basics
Standard two-conductor bell wire connects each sensor to the opener’s terminal block. Polarity matters. The red or white wire goes to the correct terminal. Wrong wiring makes the LEDs stay dark.
Common compatibility
Every LiftMaster and Chamberlain opener built after 1997 uses the same two-wire standard. Kits 041A5034 and 041-0136 fit almost all models. This makes replacement easy.
Complete Guide to Aligning and Installing LiftMaster Sensors

Step-by-step alignment procedure
I start by loosening the wing nuts on both sensor brackets. Then I rough-point each sensor so they face each other across the door opening, about 6 inches above the floor. I use a level to make sure both sensors are at the same height and square to the door track. Next, I adjust the sending sensor until the amber LED glows steady. Then I adjust the receiving sensor until the green LED is solid. Finally, I tighten the wing nuts and test by closing the door. If it reverses when nothing is in the way, I re-align.
Installing new sensor kits (041A5034 and 041‑0136)
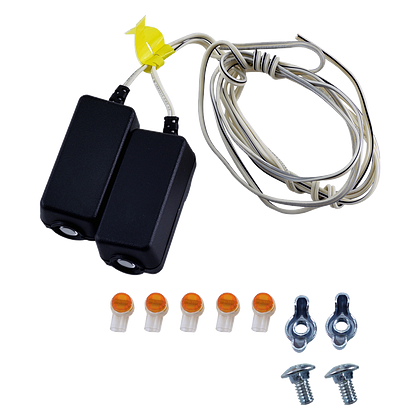
When I unbox the kit, I find two sensor units, two brackets (universal or track-mount), and screws. I mount the brackets on the vertical tracks. For some commercial models, I mount them on the wall. I slide the sensors into the brackets and hand-tighten. Then I route wire from each sensor to the opener. I connect the sender to terminals “S” and “1” and the receiver to “S” and “2.” I always check the opener manual for exact wiring. After power-up, I run the alignment steps above.
Common alignment pitfalls
Sunlight can wash out the infrared beam, especially in the morning or evening. I install sun shields or choose a different time of day for alignment. Bent or loose sensor brackets cause intermittent misalignment. I replace those brackets if damaged. Over-tightening wing nuts can shift the sensor angle. I keep them snug but not too tight.
Tools needed
I use a torpedo or laser level for height. A Phillips screwdriver for brackets. A wire stripper and cutter for wiring. A step stool helps me reach the opener motor head for connections.
Troubleshooting LiftMaster Sensor Problems (Blinking Lights, Yellow/Green Issues, Error Codes)
LED light patterns decoded
I check the lights on both sensors first. If both LEDs are off, there is no power. I test the wiring continuity, check the sensor fuse, and look at the transformer. When the sending sensor (amber) is off and the receiving sensor (green) is off too, I suspect a wiring break or a bad sensor. If the sending amber is on but the receiving green is off or flashing, the beam is not reaching the receiver. That means an alignment issue or an obstruction. A solid green light on the receiver means the system is aligned and working.
| LED Pattern | Meaning | Action |
|---|---|---|
| Both LEDs off | No power | Check wiring, fuse, transformer |
| Amber on, green off/flashing | Beam blocked / misalignment | Realign sensors, clear obstructions |
| Both amber & green solid | Normal operation | No action needed |
Why is one LiftMaster sensor green and the other yellow?
This is normal. The yellow (amber) LED shows the sending unit has power and is sending the infrared beam. The green LED tells me the receiving unit sees the beam. If the green light is off or flickering, the alignment is lost. I always tell homeowners not to worry when they see one green and one yellow – that is the correct state.
Fix for LiftMaster sensor yellow light not turning green
First, I clear any debris, spiderwebs, or dirt from the sensor lenses. Then I check for direct sunlight hitting the receiver. If sunlight is the problem, I install a shade or move the receiver a bit. Next, I use a level to make sure both sensors are perfectly horizontal and pointing straight at each other. Finally, I test by blocking the beam with my hand. The door should stop and reverse. If it doesn’t, I replace the receiving sensor.
Error codes on LiftMaster openers
My opener flashes 1–2 times when there is a sensor misalignment or obstruction. If it flashes 4–6 times, that means a safety sensor malfunction. I check my owner’s manual for the exact code for my model. The myQ app also sends notifications like “Safety sensors are blocked.” I follow the in‑app alignment guide to fix it.
Troubleshooting flowchart
I follow a simple flowchart. Step 1: Door won’t close? Check the LEDs. Step 2: If one or both sensors are dark, test voltage at the sensor. It should be 4–6 VDC. Step 3: If voltage is low, inspect the wiring for cuts, corrosion, or loose connections. Step 4: If voltage is normal but LEDs stay off, replace the sensor. Step 5: If LEDs are on but the green light flashes, realign the sensors using the steps above.
When sunlight causes yellow light on LiftMaster sensors
Direct sun can overpower the infrared receiver. I shade the receiver with my hand for a few seconds. If the green light appears, I know sunlight is the cause. I then install a sun shield or move the receiver to a spot away from direct sun.
Common sensor brackets and hardware
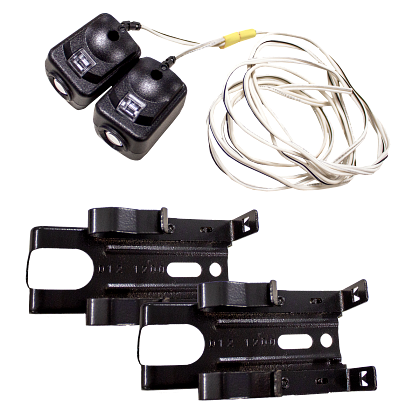
OEM brackets, like the 041‑0136 kit, come with both “L” and “U” style brackets for track mounting. Aftermarket adjustable brackets make alignment easier, but I only use ones that are UL‑listed for safety compliance.
When to Replace LiftMaster Sensors: Kits, Parts, and Installation Tips
Signs you need a new sensor kit
You need a new sensor kit if you see physical damage like cracked lenses, broken wires, or corroded terminals. Age also matters — sensors older than 15 years often fail due to worn internal parts. If you clean and tighten the brackets but the door still misaligns, the sensor is done. Intermittent failures — the door stops halfway or reverses for no clear reason — also point to a bad sensor.
LiftMaster OEM replacement kits
LiftMaster offers two main kits. The 041A5034 fits openers made before 2021 and works with most Chamberlain and LiftMaster models. It includes two sensors and universal brackets. The 041‑0136 is for openers from 2021 onward. It has deeper lens housings that block sunlight interference. Always check your opener model number on the back panel of the motor unit to make sure the kit fits.
| Kit Number | Compatible Openers | Key Features |
|---|---|---|
| 041A5034 | Before 2021 | Universal brackets, standard lenses |
| 041‑0136 | 2021 and later | Deeper housing for sunlight protection |
| 041‑0365 | Various models (check compatibility) | Wire harness included, for specific models |
Step‑by‑step replacement
First, unplug the garage door opener. Remove the old sensors by unscrewing the brackets and disconnecting the wires at the opener terminals. Mount the new brackets on the tracks or on the wall using optional plates. Run the new sensor wires along the old path to the opener. Connect the wires to the send and receive terminals as shown in your manual. Plug the opener back in, align the sensors until the green light is solid, and test the door.
Commercial sensor considerations
For commercial use, get the CPS‑U series. These have heavy-duty metal brackets, weather-sealed lenses, and a beam that stays steady in wind and dust. You must run the wires inside conduit to meet safety codes.
Cost and where to buy
Residential OEM kits cost between $20 and $40. Commercial sensors run from $50 to $100. You can buy from authorized LiftMaster dealers, online stores, or directly at LiftMaster.com.
I broke down how LiftMaster sensors work. You learned to align and install them. I covered fixing yellow lights and error codes. You also know when to replace a kit. Now trust your skills. Use these steps to keep your door safe. No more stress. Get those sensors right today.
References
Связь
Свяжитесь с нами
С WECO сегодня
No.88 Hulin Road, Daqi, Beilun, Ningbo, 315806, China
TEL & WHATSAPP: 86 15857498114
Эл. почта: shadow@weco.cc